PiWeatherRock on macOS
Running PiWeatherRock on macOS
This is guide is based on the assumption that you are using “Raspbian Buster with desktop.” Though the code works on other platforms, the setup process has been tailored for this operating system and will not work on older versions. You can verify that you are on Raspbian Buster by running this command from a terminal on you Pi:
cat /etc/os-release
Before setting up PiWeatherRock you need to setup automatic logins to the desktop. Do this by running the command sudo raspi-config in a terminal. When the program opens select “Boot Options” > “Desktop / CLI” > “Desktop Autologin”. Select finish and then reboot if prompted. You will also need to be sure and complete the configuration required in the popup that is shown on login.
This section used to tell you how to get an API key but, since Dark Sky has turned that off, there is nothing to say here at the moment. This will get updated when the migration to ClimaCell is complete.
In addition to your API key, you will also need your latitude and longitude. https://gps-coordinates.org seems to work well for this but I prefer to use the compass app on my iPhone.
The steps below are the recommended ones. Having said that, there is an alternate set linked at the end of this page.
Puppet has an open source tool called Bolt that makes it easy to perform ad-hoc tasks while also offering the option to reuse all the automation people have published on the Puppet Forge. This section will show you how to get started with PiWeatherRock via Bolt and is the recommended method as I hope to use it to add even more automation as time goes on.
The first step is to install Bolt. Go to https://puppet.com/open-source/bolt/ and click the “Get Started” link that is just below the first paragraph and follow the directions on the page it takes you to.
Step two is to download a copy of the Puppet module I have created to install and manage PiWeatherRock from https://forge.puppet.com/genebean/piweatherrock. The download button is on the right side just below the “More from Puppet” heading like seen below:
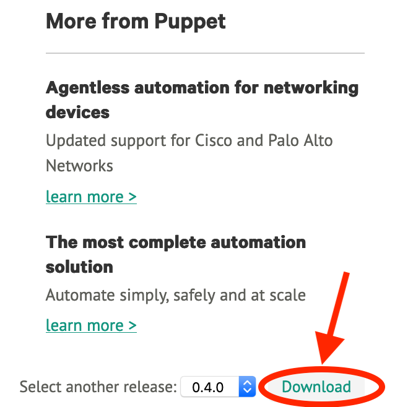
Puppet Forge May 2020
Once you have the module downloaded you will need to extract it. The file is a tarball (aka, ends in .tar.gz). Windows 10, macOS, and Linux all include a utility called tar that can be used by running these commands in a terminal:
macOS / Linux
# adjust to whereevery you downloaded the module
$ cd Downloads
$ tar -xvzf genebean-piweatherrock-*.tar.gz
Windows
# adjust to whereevery you downloaded the module
PS C:\Users\your-user-name> cd Downloads
PS C:\Users\your-user-name\Downloads> tar -xvzf genebean-piweatherrock-*.tar.gz
Windows users can also use 7-zip to extract it if needed.
This should result in a new directory named genebean-piweatherrock.
Now that Bolt is installed and the module is downloaded you can get to the part you’ve been waiting on: actually installing PiWeatherRock. To do that run the commands below from your terminal. The examples below show a macOS / Linux style prompt but the commands are the same on Windows. The only difference is that in PowerShell you will need to replace the backslash ( \ ) used for line breaks with a backtick ( ` ).
The examples below makes a few assumptions:
mylittlepi. Feel free to replace that name with whatever you want to call it.To connect to your Pi you have a couple of options:
raspberrypi.localraspberrypi with the name you gave itThe example below assumes this is a fresh install and it uses option 1. You can see what each of the flags for Bolt means by running bolt task run --help.
$ cd genebean-piweatherrock
$ bolt task run --no-host-key-check --target raspberrypi.local \
--user pi --password-prompt --run-as root \
piweatherrock::pisetup name='mylittlepi' timezone='America/New_York'
Alternative desktop
The vast majority of this guild will assume you are using “Raspbian Buster with desktop.” Having said that, minimal support for “Raspbian Buster Lite” has been added. If you are using Lite then run the command below instead of the previous Bolt command. If you have already run the one above it is fine to also run this one. DO NOT run this command unless you are using Lite or are an advanced user who is already familiar with awesome window manager.
$ cd genebean-piweatherrock
$ bolt task run --no-host-key-check --target raspberrypi.local \
--user pi --password-prompt --run-as root \
piweatherrock::pisetup name='mylittlepi' timezone='America/New_York' \
awesomewm=true
The process you just ran will have fully patched your Pi’s operating system and changed its hostname. To ensure that everything runs smoothly I suggest rebooting it at this stage. Bolt can do this for you too like so:
$ bolt task run reboot --targets raspberrypi.local --user pi \
--password-prompt --run-as root
Started on raspberrypi.local...
Finished on raspberrypi.local:
  {
    "status": "queued",
    "timeout": 3
  }
Successful on 1 target: raspberrypi.local
Ran on 1 target in 6.32 sec
Post-reboot you will need to start connecting with the new hostname. You can check that the reboot has actually happened by running another bolt task like so (note the new target name):
$ bolt task run reboot::last_boot_time --targets mylittlepi.local --user pi \
--password-prompt --run-as root
At this point you will have two new systemd services on your Pi.
The first one facilitates configuring PiWeatherRock by navigating to port 8888 of your Pi. If you named your Pi mylittlepi then you would go to http://mylittlepi.local:8888. From there you will need to enter your API key and click update. Once you do that you should see PiWeatherRock running on the monitor connected to your Pi. If not, try running the command below to restart the service:
$ bolt task run --targets mylittlepi.local --user pi --run-as root \
--password-prompt service action=restart name=PiWeatherRock
Currently, logging is done to a file named .log that is stored in the current directory which now equates to your home directory (aka /home/pi). The logs are viewable by going to http://mylittlepi.local:8888 again and toggling the switch at the top to “Advanced” and then scrolling to the bottom and clicking “Go to log.”
Let me start with a warning: this option is more complicated and more likely to result in typos that cause things to not work as intended. It is also a transcription of what I am telling software to do automatically in Option 1. I will try to keep this up to date but strongly encourage you to use the process outlined above. If this still sounds appealing then please see Install Option 2.
Running PiWeatherRock on macOS
Information on changing the units used for forecasts
Optional additional steps to supplement the default setup.
Was this page helpful?
Glad to hear it! Please tell us how we can improve.
Sorry to hear that. Please tell us how we can improve.